Encouragement

Stampin’ Up Golden Afternoon Thumping Technique Video Tutorial

May 12, 2019

I was taken with the Stampin’ Up Golden Afternoon when I first saw it
but was a bit puzzled how to make it come to life for me.


I was going to sponge some different colors on the leaves but then remembered a card
I did when I first started holding classes…
it was back in 2013 using the Thumping Technique.
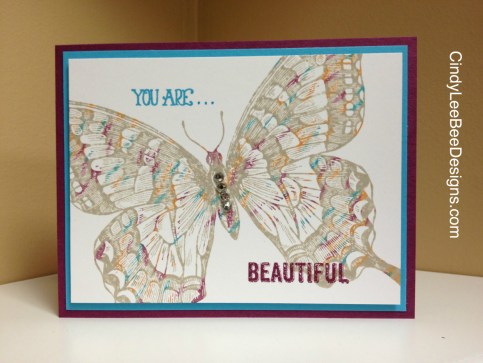
So, I did the Thumping Technique using my Stampin’ Write Markers on the Golden Afternoon tree.
See the lovely subtle shades of green that make the tree come to life? I stamped the entire image in Pear Pizzazz ink and then thumped on Shaded Spruce, Old Olive, and Garden Green with my Stampin’ Write markers- NOT the alcohol based Stampin’ Blends.

After I thumped on the leaves, I colored directly on the trunk and branches with an Early Espresso Stampin’ Write marker.

I love the little tree image in the stamp set, too. I did put it in the inside bottom right but forgot to take a pic- and the card has been sent out to someone:)

Here is a quick video showing how to do it:


Thanks for buzzing by, friends…


Product List

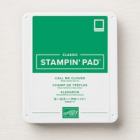
Pear Pizzazz Classic Stampin' Pad

Pear Pizzazz Classic Stampin’ Pad
[119784]
$5.95

Stampin’ Up All That You Are with the Well Said Bundle

March 16, 2019

The Stampin’ Up All That You Are stamp set is the first stamp set in the Occasions Catalog,
and I think it belongs at the top of the list.
Isn’t it pretty?

The big bloom is just gorgeous, and the pretty posies, the foliage, and the sentiment label are cut out with the Frosted Bouquet Framelits.
Remember the Frosted Bouquet Framelits were bundled with the First Frost stamp set in the Holiday catalog so if you have that bundle, you can add the Stampin’ Up All That You Are stamp set to your collection and have two stamp sets that work with the framelits!

I paired the Stampin’ Up Well Said Bundle with the Stampin’ Up All That You Are stamp set on the outside and the inside.


Thanks for buzzing by, friends…


Product List

Stampin’ Up Dear Doily Bundle

February 1, 2019

Here’s a bright one for you today! I used three of our 2018-2020 In Colors-
Blueberry Bushel, Pineapple Punch, and Call Me Clover.

I was inspired by a catalog sample and totally changed it up. You can really see how bright these colors are when they are all combined. The photopolymer stamped images stamp so crisp and clean and look so great with the die cut doilies.

When I design a card, I like to carry all the colors from the outside into the inside of the card.For example, since the card stock is green, I stamped yellow and blue so the eye sees all the colors again on the inside. Sometimes I neglect my inside, how about you? Do you always decorate the inside or forget?

Thanks for buzzing by, friends…


Product List

Stampin’ Up Nine Lives Mirror Image Stamping Technique Video Tutorial

January 23, 2019

Notice how my cats are facing different directions? How did I do that?

 It’s Wednesday, it’s Video Day where I will show you how to do Mirror Image Stamping!

Back in the day, Mirror image stamping was done with  the Stamp-a-ma-jig and acetate
but now the Stamparatus and the Silicone Mat make the technique super easy!

You can try this technique with any image you want to face the opposite direction than the stamp would actually stamp. The Dog in the Happy Tails bundle is another great image to mirror image stamp. Can you think of any more  off hand? That’s your homework…

Measurements:
Basic Gray Card Base: 4-1/4″ x 11″ scored at 5-1/2″ on the 11″ side and 4″ x 5-1/4″ for crate
Whisper White: (2) 4″ x 5-1/4″ for the outside embossed panel, 2″ square for sentiment, and the inside of card and a piece big enough for the cat
Smokey Slate: a piece big enough for the cat
Basic Black: 2″ square for the circle border around sentiment

Thanks for buzzing by, friends…


Product List

Cat Punch

$18.00