Month: July 2019

Using the Negative Die Cut Video Tutorial with the Stampin’ Up Praiseworthy Prose Bundle

July 31, 2019

It’s Wednesday…time for a video tutorial!
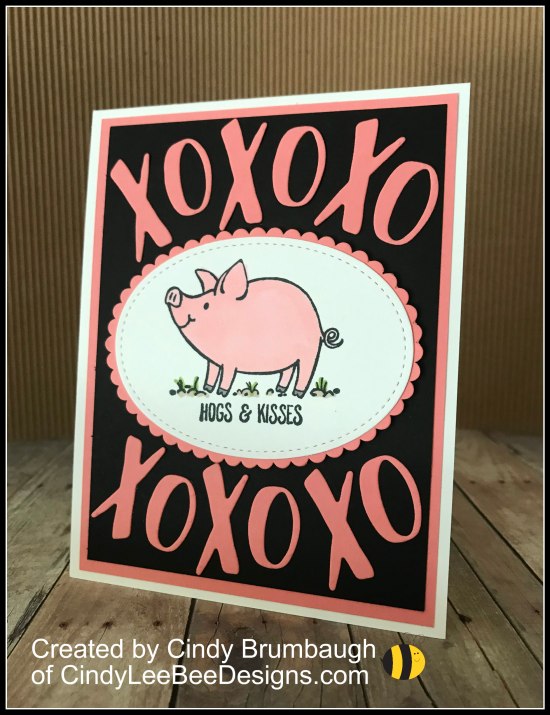
This one shows how to use the Negative Die Cut for an accent on your card creations:)

The Hand Lettered Prose Dies are a great alphabet to use on an A2 sized card.
Thank You fits wonderfully:)
Think of all the words you could use on a card…baby, wow, love, super, happy, the list goes on…

The extra layer of cardstock under the DSP gives just a little more depth for the negative die cut letters to show off. Next Wednesday, I have another video showing a neat way to accent your card with the Hand Lettered Dies so make sure to visit.


Measurements:
Garden Green Card Base: 5-1/2″ x 8-1/2″ scored at 4-1/4″ on the 8-1/2″ side
Garden Lane DSP: 4″ x 5-1/4″ placed over a slightly smaller piece of the same color card base (almost the same size)
Whisper White inside: 4″ x 5-1/4″ with a strip of 3/4″ x 4″ DSP
Mint Macaron for leaves: 2″ x 4″
Whisper White for sentiment: 1-1/2″ x 4-1/2″


Today is the last day to get a $5 coupon with a $50 order to use in August.


July 1 – 31, spend $50 (before tax and shipping) and earn a $5 coupon that is emailed to you that you can redeem in August!
REMEMBER, YOU MUST SAVE THAT COUPON CODE, IT CAN NOT BE RETRIEVED LATER…SO KEEP IT HANDY!


Thanks for buzzing by, friends…


Product List

Stampin’ Up This Little Piggy with Hand Lettered Prose Dies

July 29, 2019

Happy Monday, friends!

I played with the Stampin’ Up This Little Piggy and the Hand Lettered Prose Dies yesterday.

I  love the HOGS & KISSES sentiment in the This Little Piggy stamp set. I thought the Hand Lettered Prose would pair well showing the XOXO!

I used the Light Flirty Flamingo Stampin’ Blend on my piggy. It matched quite nicely with the cardstock. And you know I die cut my scallop oval out of the bordering panel on the card:)

Come back and visit on Wednesday when I will share a video using the Hand Lettered Dies and the Praiseworthy Prose stamp set. Visit my Youtube Channel CindyLeeBeeDesigns.com to view some of my other fun videos!

Thanks for buzzing by, friends…

Product List

Stampin’ Up Daisy Lane with the Delightful Tag Topper Punch

July 26, 2019

I attended a Shoebox Swap last Saturday with some great girls! At a Shoebox Swap, a stamper creates a card, preps for the card, and each stamper goes to that station and makes that card. There is no die cutting or embossing with the BigShot for time’s sake, so we find creative ways to make our kits. My kit was the Dino Days Fun Fold so I had each stamper use the Stamparatus to stamp on blank white dinos I die cut ahead of time. They just popped the white dino in the template I cut out ahead of time and stamped a perfectly placed dino using Pretty Peacock and Mango Melody ink. I also had the Stitched ovals and scallops cut ahead of time. Easy Peasy.

One of the cards I made was designed by my friend, Jackie Walker. Great card to do with the Daisy Lane stamp set and the Medium Daisy Punch. Jackie had the embossing done and the tag punched in our kits. We stamped the daisies and punched them out.

I love how pretty the Woven Threads DSP looked with the Tufted 3D Embossing Folder. I added a Seaside Spray NEW InColor Faceted Dot to the middle of the flower. It has sort of a “tufted” look to it. Doesn’t the NEW  Terracotta Tile Scalloped Linen NEW InColor ribbon look great in Jackie’s design, too? The touch of a Linen Thread bow ties in well with the ribbon. The tag topper is the NEW Delightful Tag Topper. The Delightful Tag Topper Punch is a great way to add a fun shaped tag to gifts and cards. It cuts tag toppers in 1″ (2.5 cm), 1-1/2″ (3.8 cm), and 2″ (5.1 cm) widths.

I will probably share some other great cards in the future. It was a fun day getting together with fellow demonstrators sharing ideas and cards. Ladies, thank you for all the fun!


Product List

Stampin’ Up To a Wild Rose Split Negative Technique Video Tutorial

July 24, 2019

I played around with a neat technique on this card. Another great way to use my Stamparatus!

It is called a Split Negative Technique usually done with white embossing powder on a colored background but this time, I used two colors of ink on two colors of cardstock.

Here is a video of how easy it is to make one…

or two…as you can see!

Measurements:
Card Base: 5-1/2″ x 8-1/2″ scored at 4-1/4″ on the 8-1/2″ side
Mango border panel on front: 4″ x 5-1/4″
Thick Whisper White and Coastal Cabana stamped panels: 3-3/4″ x 5″,
After stamping the panels, cut both of the panels into two pieces at the same time where you find it works well with the image you used. Then match up the opposite images.

Thanks for buzzing by, friends…


Product List

Stampin’ Up Silhouette Scenes is Raining Hearts

July 22, 2019

I was playing around with my Silhouette Scenes stamp set and came up with this…

I used the Stitched Be Mine Dies to cut out the fun cloud of hearts.
After I ran it through the Big Shot, I placed back some select hearts and scattered some around the top of the cloud of hearts and the couple.

I stamped the couple with Memento Ink about three times for a deep black image.

Thanks for buzzing by, friends…


Product List