gallery card

Stampin’ UP! Hope and Prayers with Hand Penciled DSP Triple Diamond Step Card Video Tutorial

November 30, 2022

The Triple Diamond Step Fold is so easy to make and packs a WOW! I used the Stampin’ UP! Hand Penciled Designer Series Paper and had a little color therapy while the grandie girls napped. Once the coloring was done I just whipped it together.

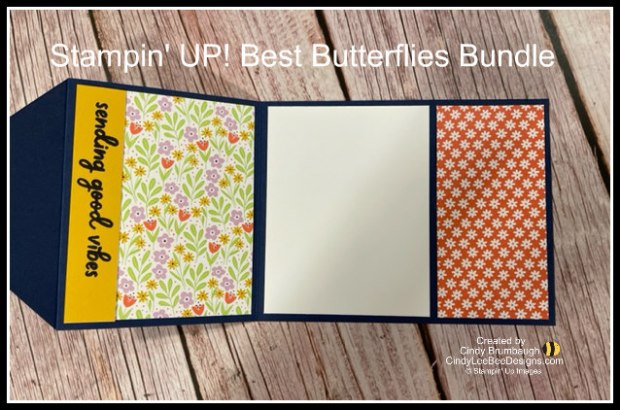
Take a look at how easy it is to make…

I colored one with Real Red Stampin’ Blends.

I colored one with Polished Pink Stampin’ Blends, too.

A beautiful sentiment to remind the recipient you have them in your prayers goes on the back:)

Measurements: Card Base: 5-1/2″ x 9-1/4″ scored at 1, 2, 3-1/2″, 5, and 7-1/8″, Black Squares: 2-7/8″ , 2-5/8″, and 2-3/8″, DSP Squares: 2-5/8″, 2-3/8″ and 2-1/8, DSP Step Strips: 3/4″ x 5-1/4″, 1-1/4″ 5-1/4″, 1-7/8″ x 5-1/4″, White on back: 1-7/8″ x 5-1/4″

Thanks for buzzing by, friends…

Product List

Stampin’ UP! Decorated with Happiness Bundle

November 28, 2022

Just a quick and easy Christmas card for you today using the Stampin’ UP! Decorated with Happiness Bundle. I am still in love with the Stampin’ UP! Painted Christmas Designer Series Paper. It’s just one of those great traditional Christmas DSPs. And the Decorated with Happiness Bundle is just one of those great Christmas Bundles so they just go together!

The card base is 5-1/2″ x 8-1/2″ scored at 4-1/4″ on the 8-1/2″ side. The DSP is 2-1/2″ x 5-1/4″ and the stamped white panel is 3-1/4″ x 4-1/2″ bordered by a Garden Green piece measuring 3-3/8″ x 4-5/8″.

The Stampin’ UP! Decorated with Happiness Bundle is on the Retiring List from the July-December 2022 Mini Catalog. You have a few days to peruse the Retiring List below with the discounts coming up!

Please note that the Retiring List goes active on December 1st!

A special shout out to Deb Snyder for sharing her spreadsheets!

Here is the Retiring List in PDF form

See the Carry Over List below:

CategoryPageItem #Name
EMBELLISHMENTS9159577REAL RED & GARDEN GREEN 3/8″ RIBBON COMBO PACK
PAPER13159788ENVELOPE TREAT BOXES
STAMP SETS14159722REGAL REINDEER CLING STAMP SET
TOOLS14159727REINDEER DIES
EMBELLISHMENTS25159966TEXTURAL ELEMENTS (will only be visible online)
EMBELLISHMENTS31159555GOLD & VANILLA 3/8″ SATIN EDGED RIBBON
EMBELLISHMENTS31159963FESTIVE PEARLS
STAMP SETS33159542BRIGHTEST GLOW CLING STAMP SET
STAMP SETS38159821SNOW CRYSTAL CLING STAMP SET
STAMP SETS40159773HOPE & PEACE CLING STAMP SET (will only be visible online)
EMBELLISHMENTS43159629BALMY BLUE & WHITE 3/8″ DOUBLE-STITCHED RIBBON
TOOLS43159625GNOMES DIES
STAMP SETS46159791PERCHED IN A TREE CLING STAMP SET
TOOLS46159798ASPEN TREE DIES
TOOLS49159971EMBOSSING ADDITIONS TOOL KIT
TOOLS53159847LEAF FALL 3D EMBOSSING FOLDER (will only be visible online)
STAMP SETS54159944APPLE HARVEST CLING STAMP SET
STAMP SETS59159652COTTAGE WREATHS PHOTOPOLYMER STAMP SET
EMBELLISHMENTS59159662SILVER-THREADED TWINE
TOOLS59156310PEARLIZED ENAMEL EFFECTS BASICS
TOOLS59160238COUNTRY WREATHS DIES
STAMP SETS62159883RINGED WITH NATURE PHOTOPOLYMER STAMP SET
STAMP SETS67159974CELEBRATE WITH TAGS CLING STAMP SET
STAMP SETS68159871VERY BEST OCCASIONS CLING STAMP SET
TOOLS68159878VERY BEST TRIO PUNCH
TOOLS73159888TREE RINGS HYBRID EMBOSSING FOLDER
TOOLS77159551LABELS AGLOW DIES
TOOLS79159690HANDMADE TAG PUNCH

Thanks for buzzing by, friends…

Product List

Stampin’ UP! Party Puffins with 4 x 4 DSP Tip Video Tutorial

November 16, 2022

I have an old paper cutting tip to share with you today! It takes only a 4″ x 4″ piece of DSP to fill the front of your card! The Stampin’ UP! Black & White Designs DSP has some cool patterns that can be flipped and matched up. But you can do this technique with any DSP you want- using one piece of 4″ x 4″ on one card using the front and back or the same pattern or make two cards using different patterns like these cards.

That puffin is just too cute! Check out my video showing how I put these together…

So many fun ways to put the diagonal strip on the middle of the card. Take a look at these cards where I mixed and matched the card bases, diagonals strips and it appears the DSP.

That cute little “bowtie” is a sneak peek of a kite tie from the upcoming Stampin’ UP! Playing in the Rain Dies that I showcased at the Onstage event in Pittsburgh last week. Doesn’t it look so cute on the puffin?

Here is the inside of the cards…I noticed when I was uploading it that one of the candle flames was missing…oops!

Measurements: Card Base: 4-1/4″ x 11″ scored at 5-1/2″ on the 11, DSP: 4″ x 4″ cut as seen in video, Basic White or black panel for mounting DSP and inside: 4″ x 5-1/4″, Diagonal strip: 7/8″ x 6-1/2″, Scraps for ovals and banners

Thanks for buzzing by…

Product List

Stampin’ UP! Best Butterflies Bundle Diamond Flip Card

July 4, 2022

Happy Fourth of July everyone!

I have a fun summer card for you using the Diamond Flip Fun Fold Design.

You can see a video at the end of this post to see you to fold the card.

It opens up to show more pretty Stampin’ UP! Butterfly Kisses Designer Series Paper. The Butterly DSP on the front and inside is 2-7/8″ x 4″- the DSP on the inside 3-1/8″ x 4″. The DSP on the right is 2″ x 4″. The Basic White is 3-1/8″ x 4″. On the outside, I stamped the sentiment on a 1/2″ x 4″ piece of cardstock to accommodate the sentiment. When you use a 2-7/8″ DSP and a 3-1/8″ on the inside side or outside (or switch them) you can get one card out of one 6″ x 6″ piece of DSP since you will be using the leftover 2″ x 6″ for the inside right! The larger diamond border on the outside is a 3″ square and the smaller diamond inside it is 2-3/4″.

On the card below, I did the inside a bit different, I stamped a 3/4″ x 4″ strip of cardstock with the another sentiment saying “sending good vibes”. Again, the size accommodates the sentiment.

Measurements: Card Base: 4-1/4″ x 11″ scored at 2-1/8″ and 5-1/2″ on the 11″ side. Cut arrow point as seen in the video tutorial I made using the Brewed for You Bundle.

Thanks for buzzing by, friends…

Product List

Stampin’ UP! 25 Again Fun Fold Video Tutorial

November 7, 2018

I am so excited to be leaving for the Orlando Stampin’ Up Onstage Convention today!
I made this video of a neat fun fold the day before I left…
so maybe it is a little crazy because I was all hyped up…lol.


I just love that gold candle embellishment!

You can easily make it a gift card holder by adhering the circle to the gift card and
then adhering the gift card to the card base.

I added some little gold dots to the candles using a Gold Sharpie Marker to add a little gold to the inside
along with the sequins I am not so sure belong…hahaha

Measurements:
Use the Layering Circle Framelits for the Circles as follows:
25 Again Circle: use 1-7/8″ for the white circle, use 2-1/8″ for the black circle, use 2-1/4″ for the gold scallop
Cake Circle: use 1-3/8″ for the white circle, use 1-5/8″ for the black circle, use for 1-3/4″ the the gold scallop
You’re How Old? Circle: use 1-7/8″ for the white circle, use 2-1/8″ for the black circle, use 2-1/4″ for the gold scallop
Card Opening at top: use the 2-7/8″ circle to cut the DSP and then the 2-5/8″ circle to cut inside the DSP on the Black Cardstock itself

Card Base: Basic Black 4-1/4″ x 11″ scored at 2-1/2 and 6-3/4″ on the 11″ side.
Trim off 1/4″ off of the right side while still in the trimmer.
(3) 2-1/2″ Basic Black squares for circles
Broadway Bound DSP: Top 2-1/4″ x 4″, Bottom 4″ x 3-3/4″
Gold Foil: (3) 2-1/2″ squares for scallops
Whisper White inside: 4″ x 3-3/4″, (3) 2″ squares for circles


Thanks for buzzing by, friends…

Product List